Automatically Allocating Clients to Agents
Live Chat allows your helpdesk agents to accept client live chat requests automatically. Once a client initiates a live chat request, DRUID automatically connects them to an available helpdesk agent. Available agents are logged-in agents who did not reach the concurrent chat limit and did not request a break.
Benefits
- Maximizes the call center productivity by spreading the work evenly across your call center team, ensuring equal workload for all your agents
- Reduces the clients wait time, which helps reduce queue abandonment.
Concurrent Chat Limit
To configure the maximum number of chat conversations above which DRUID platform will not automatically connect waiting clients to agents, you should take into consideration the following aspects:
- You have only the generic queue, there are no queues defined. To configure the maximum number of chat conversations above which DRUID platform will not automatically connect waiting clients to agents, go to the AI Agent details, click the Live Chat section header and in the to Max number of sessions for automatic allocation field, type the desired value. The default value is 0, which means that automatic allocation is disabled.
- You have queues defined. In this case, the Max number of sessions for automatic allocation settings no longer appears on the AI Agent details page; the Has automatic allocation setting appears in the Live Chat section and it is disabled and non-editable.

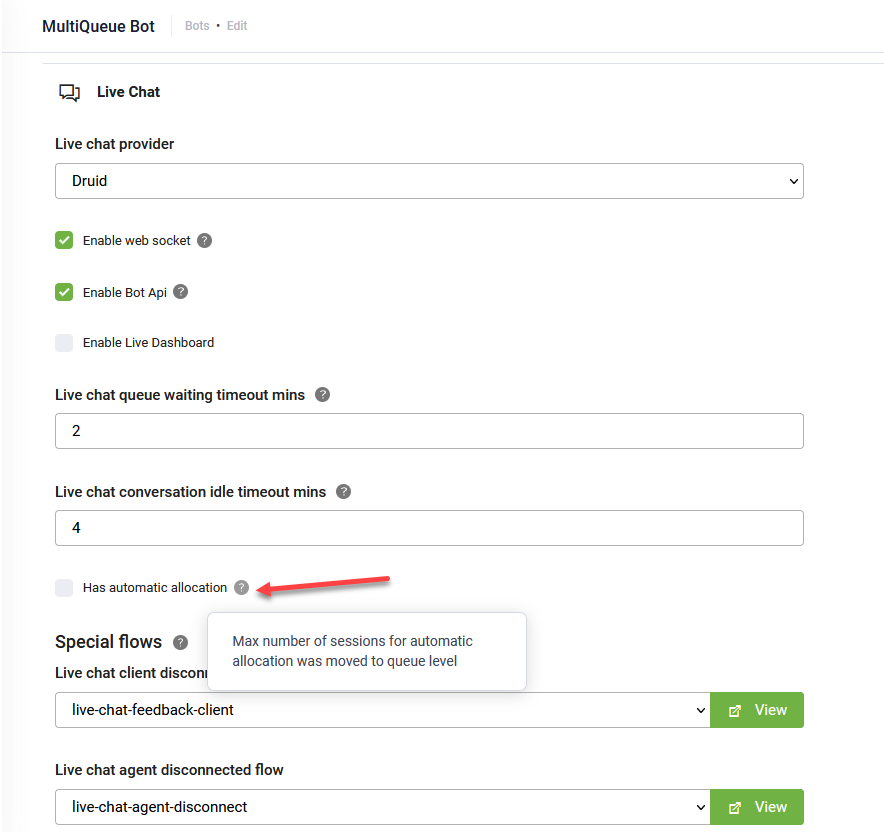
Set the Max number of sessions for automatic allocation per queue.

After you set the Max number of sessions for automatic allocation for a queue / more queues, the Has automatic allocation setting in the AI Agent details page is automatically enabled.
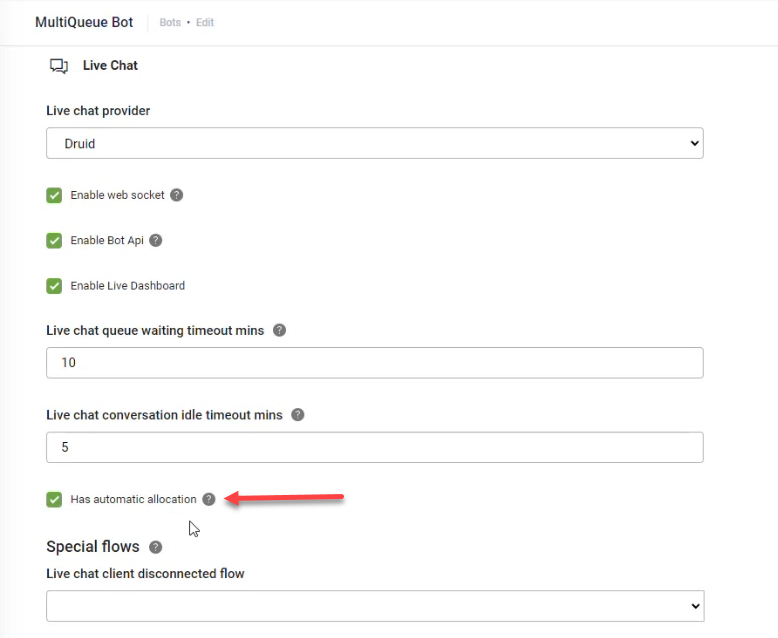
If the Max number of sessions for automatic allocation is set on queues, DRUID takes into consideration the minimum value of the setting on queue level when automatically allocating clients to agents.
If you want to place live chat calls to a specific waiting queue and automatically allocate clients to agents, you can do so by editing the live-chat-connect-to-agent flow. Add an action step and in the Pre / PostActions section, add the internal action ConnectToHelpdeskAgent, enter the queue code (not the queue name) and add the following additional parameter: "AutomaticAllocation" : true (in JSON format).
For example:
Example - Automatic allocation to [[MyEntity]].CodeOfTheQueue
{
    "QueueCode" : "[[MyEntity]].CodeOfTheQueue",
    "AutomaticAllocation" : true
}

When transferring clients to another queue, you can automatically allocate clients to agents. To do so, add the following additional parameter to internal action TransferHelpdeskCall: "AutomaticAllocation" : true (in JSON format)
For example:
Example - Automatic allocation to [[MyEntity]].CodeOfTheQueue
{
    "QueueCode" : "[[MyEntity]].CodeOfTheQueue",
    "AutomaticAllocation" : true
}
![]()
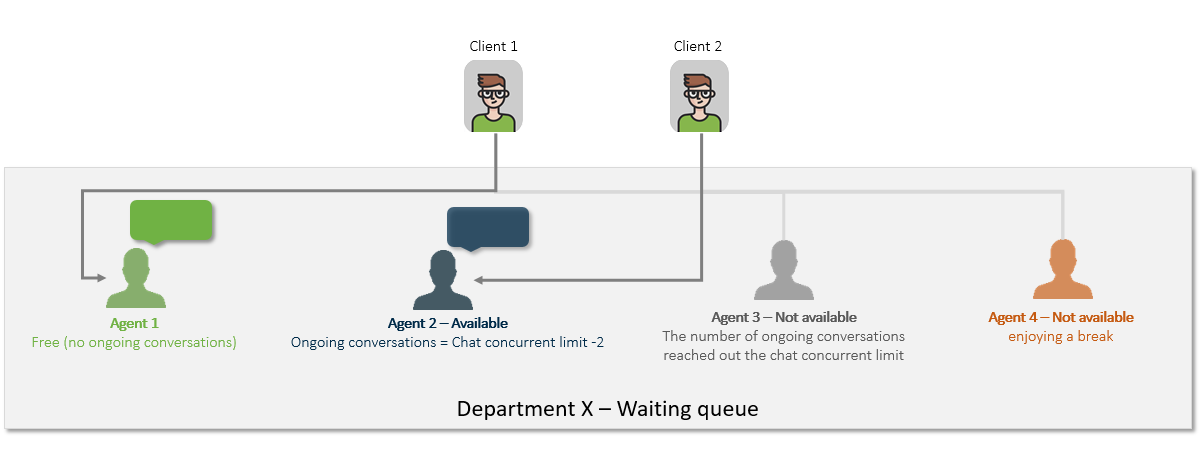
Chat Allocation Rules
DRUID will automatically allocate clients entering in a waiting queue to an agent, following these rules:
- Allocate client to an agent who is free (has zero ongoing live conversations).
- If no agent is free, allocate the client to an agent who has not reach out the concurrent chat limit following these criteria:
- Allocate client to the agent who has the least number of connected clients.
- Allocate client to an agent based on the time of the last connection with a client in ascending order.
- If all agents are busy (have reach out the concurrent chat limit), during break or have requested a break, the client remains in the waiting queue and will be allocated to the first available agent.
For information on how to enable the Break functionality, see Live Chat With Multiple Queues, Step 6.